Introduction
Recently I discovered PowerSync as I was looking for an offline-first solution for a mobile application I was working on. PowerSync provides a suite of demo apps, but I wanted to get started with the web SDK in an empty scaffold and build up from there. This post will take you step-by-step through what I learned about how to set up and use PowerSync together with Supabase.
Create a Simple App
First you will create a simple application which consists of a web page, a text input, and a list to which input items are added, a button to clear the list, and the ability to edit an item. Later you will add PowerSync and then Supabase, after which the application will synchronize your data with a remote Supabase instance.
Scaffold Project
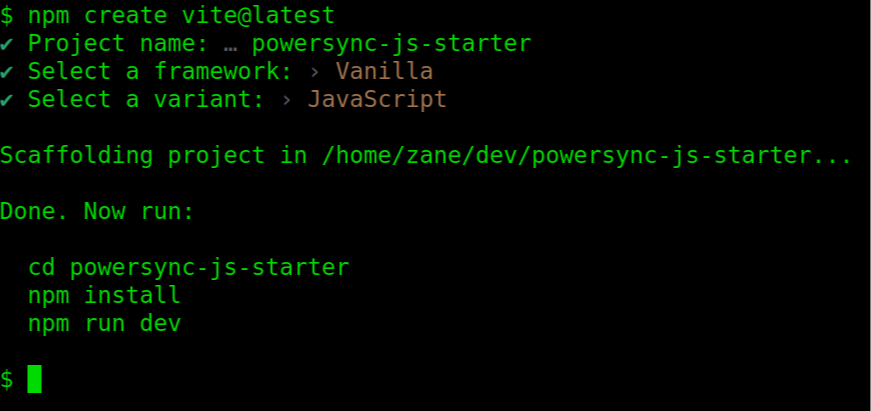
Scaffold a project using Vite, documented here.

Update Files
Remove files %%counter.js%%, %%javascript.svg%%, %%main.js%%, %%style.css%%.
Replace the contents of index.html:
<!DOCTYPE >
<html lang="en">
<head>
<meta charset="UTF-8">
<link rel="icon" type="image/svg+xml" href="/vite.svg" />
<meta name="viewport" content="width=device-width, initial-scale=1.0">
<title>Vite PowerSync Basic Setup</title>
<script defer type="module" src="./src/index.js"></script>
<link rel="stylesheet" href="./src/style.css">
</head>
<body>
<div id="wrapper">
<header>Vite PowerSync Basic Setup</header>
<input type="text" id="inputField" placeholder="Type something and press Enter">
<div id='listWrapper' style="width:fit-content; min-width: 400px;">
<button id='clearButton' style="float:right" id="clearList">Clear List</button>
<ul id="itemList">
</ul>
</div>
</div>
</body>
</html>
Replace the contents of %%.gitignore%%:
node_modules
.env
.env.*
dist
Create Files
Create folder [.inline-code-snippet]src[.inline-code-snippet] in the project’s root.
Add [.inline-code-snippet]src/index.js[.inline-code-snippet]:
let inputField;
let itemList;
let clearButton;
let editing = null;


document.addEventListener("DOMContentLoaded", (event) => {
 inputField = document.getElementById("inputField");
 itemList = document.getElementById("itemList");
 clearButton = document.getElementById("clearButton");


 inputField.addEventListener("keydown", keyDown);
 itemList.addEventListener("click", itemClick);
 clearButton.addEventListener("click", clearList);
});


const keyDown = async (event) => {
 if (event.key === "Enter") {
   if (!editing) {
     appendItem(inputField.value);
   } else {
     editing.innerText = inputField.value;
   }
   inputField.value = "";
   editing = null;
 }
};


const itemClick = async (event) => {
 editing = event.target;
 inputField.value = editing.innerText;
 inputField.focus();
};


async function clearList() {
 itemList.innerHTML = "";
 inputField.value = "";
 inputField.focus();
}


const appendItem = (name) => {
 const item = document.createElement("li");


 item.innerText = name;
 itemList.appendChild(item);
};
Add [.inline-code-snippet]src/style.css[.inline-code-snippet]:
header {
  padding: 10px 0;
  font-size: larger;
}

#wrapper {
  margin: auto;
  width: fit-content;
}
#inputField {
  padding: 10px;
  font-size: 16px;
  width: 300px;
}

#listWrapper {
  margin-top: 0px;
  width:fit-content;
}
#itemList {
  margin-top: 0px;
  list-style-type: none;
  padding-left: 0;
  width:300px;
}

#itemList li {
  padding: 5px 0;
  font-size: 18px;
}
Run Project

Enter items, edit an item by selecting it from the list, and clear the list. Enter a few items again and reload the page. The items are gone. PowerSync to the rescue!
Add PowerSync
Next you will add packages and basic PowerSync functionality. After you have completed this step, items will be saved in a local WASM SQLite database; reloads will render the saved list items.
Add Packages
[.inline-code-snippet]npm install vite-plugin-top-level-await vite-plugin-wasm[.inline-code-snippet]
[.inline-code-snippet]npm install @journeyapps/wa-sqlite @powersync/web[.inline-code-snippet]
Configure Vite
By default, Vite will crawl and bundle all of the files in your project. The [.inline-code-snippet]journeyapps/wa-sqlite[.inline-code-snippet] and [.inline-code-snippet]powersync/web[.inline-code-snippet] files must be excluded from that process. However, if your project does not use [.inline-code-snippet]js-logger[.inline-code-snippet], you must include it or you will have an error when running dev. Also note that the WASM worker must be configured correctly.
Add [.inline-code-snippet]vite.config.js[.inline-code-snippet] to the root of the project:
import path from "path";
import wasm from "vite-plugin-wasm";
import topLevelAwait from "vite-plugin-top-level-await";
import { defineConfig } from "vite";


// https://vitejs.dev/config/
export default defineConfig({
 root: ".",
 build: {
   outDir: "./dist",
   rollupOptions: {
     input: "index.html",
   },
   emptyOutDir: true,
 },
 resolve: {
   alias: {
     "@": path.resolve(__dirname, "./src"),
   },
 },
 envDir: ".", // Use this dir for env vars, not 'src'.
 optimizeDeps: {
   // Don't optimize these packages as they contain web workers and WASM files.
   // https://github.com/vitejs/vite/issues/11672#issuecomment-1415820673
   exclude: ["@journeyapps/wa-sqlite", "@powersync/web"],
   include: ["@powersync/web > js-logger",],
 },
 plugins: [wasm(), topLevelAwait()],
 worker: {
   format: "es",
   plugins: () => [wasm(), topLevelAwait()],
 },
});
Create Schema
PowerSync uses a schema to create and use tables in your local SQL database.
Create file [.inline-code-snippet]src/database/schema.js[.inline-code-snippet]:
import { column, Schema, TableV2 } from "@powersync/web";

const list = new TableV2({
 created_at: column.text,
 name: column.text,
});

export const schema = new Schema({
 list,
});
The schema defines a table list having columns created_at and name. The name column will store values entered into the input, created_at will be null for now. Later Supabase will provide values for created_at.
Create PowerSync Database
PowerSync provides direct access to your SQLite database.
Create the file [.inline-code-snippet]src/database/index.js[.inline-code-snippet]:
import { PowerSyncDatabase } from "@powersync/web";
import { schema } from "./schema";


let PowerSync;


// Instantiate PowerSync database
const create = (config) => {
 console.log("Creating PowerSyncDatabase");
 PowerSync = new PowerSyncDatabase({
   schema,
   database: {
     dbFilename: config.dbFilename,
   },
 });
 console.log("PowerSyncDatabase Created");
};


export const openDatabase = async (config) => {
 create(config);
};


// Subscribe to changes in data
export function watchList(onResult) {
 PowerSync.watch(`SELECT * FROM list ORDER BY created_at`, [], {
   onResult: (result) => {
     onResult(result.rows);
   },
 });
}


export const insertItem = async (name) => {
 return PowerSync.execute(
   "INSERT INTO list(id, name) VALUES(uuid(), ?) RETURNING *",
   [name]
 );
};


export const updateItem = async (id, name) => {
 PowerSync.execute("UPDATE list SET name = ? WHERE id = ?", [name, id]);
};


export const deleteItem = async (id) => {
 PowerSync.execute("DELETE FROM list WHERE id = ?", [id]);
};


export const allItems = async () => {
 return PowerSync.getAll("SELECT * FROM list");
};


export const deleteAllItems = async () => {
 PowerSync.execute("DELETE FROM list");
};
After the [.inline-code-snippet]PowerSyncDatabase[.inline-code-snippet] has been created, you can freely use SQLite — your data will be persisted locally.
The function [.inline-code-snippet]watchList[.inline-code-snippet] makes it easy to react to changing data. The callback will be invoked whenever [.inline-code-snippet]allItems[.inline-code-snippet] and the functions which modify rows are invoked.
Update src/index.js
Insert the following at the top of [.inline-code-snippet]src/index.js[.inline-code-snippet]:
import {
 openDatabase,
 insertItem,
 updateItem,
 allItems,
 deleteAllItems,
 watchList
} from "@/database";
Add the configuration:
const config = {
 dbFilename: "powersync.sqlite",
};
Replace [.inline-code-snippet]document.addEventListener[.inline-code-snippet]:
document.addEventListener("DOMContentLoaded", async (event) => {
 inputField = document.getElementById("inputField");
 itemList = document.getElementById("itemList");
 clearButton = document.getElementById("clearButton");


 inputField.addEventListener("keydown", keyDown);
 itemList.addEventListener("click", itemClick);
 clearButton.addEventListener("click", clearList);


 inputField.disabled = true;
 inputField.placeholder = "Opening Database...";
 await openDatabase(config);


 watchList((rows) => {
   populateList(rows._array);
 });


 await allItems();


 inputField.placeholder = "Type something and press Enter";
 inputField.disabled = false;
});
Replace the [.inline-code-snippet]keyDown[.inline-code-snippet] function:
const keyDown = async (event) => {
 if (event.key === "Enter") {
   if (!editing) {
     insertItem(inputField.value);
   } else {
     updateItem(editing.id, inputField.value);
   }
   inputField.value = "";
   editing = null;
 }
};
Replace the [.inline-code-snippet]clearList[.inline-code-snippet] function:
async function clearList() {
 deleteAllItems();
 inputField.value = "";
 inputField.focus();
}
Replace the [.inline-code-snippet]appendItem[.inline-code-snippet] function:
const appendItem = (row) => {
 const li = document.createElement("li");

 li.innerText = row.name;
 li.id = row.id;

 itemList.appendChild(li);
};
Add the [.inline-code-snippet]populateList[.inline-code-snippet] function:
const populateList = (rows) => {
 itemList.innerHTML = "";
 for (const row of rows) {
   appendItem(row);
 }
};
Run and Test
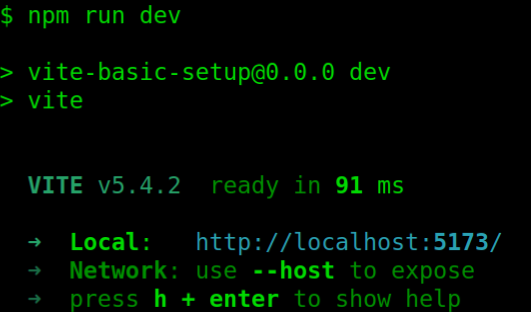
At the console enter [.inline-code-snippet]npm run dev[.inline-code-snippet]. Test adding, modifying, and deleting items. Ensure reloading the browser displays the items you have entered and modified. After you have verified the code is correct, move on to the next step.
Create and Set Up PowerSync and Supabase Projects
Before you can add Supabase to your project you will need PowerSync and Supabase accounts. If you do not already have PowerSync and Supabase accounts you need to create them. You can create a new PowerSync account here, and a new Supabase account here. If you see JourneyApps when you might expect to see PowerSync, there’s no cause for concern: it’s the correct website, PowerSync is a product of the company JourneyApps.
Supabase Project
Using the Supabase Dashboard, create a new project named [.inline-code-snippet]powersync-basics[.inline-code-snippet]. You will need to enter a password. Don’t lose it, the password is needed for the next step. You can accept the defaults; click [.inline-code-snippet]Create Project[.inline-code-snippet].
On the left side of the home page is a menu; select the SQL Editor. After it opens, click the [.inline-code-snippet]New query[.inline-code-snippet] button, enter the following, and then click the [.inline-code-snippet]Run[.inline-code-snippet] button.
CREATE TABLE list (
  id uuid default gen_random_uuid() PRIMARY KEY NOT NULL,
  name text NOT NULL,
  created_at timestamp with time zone DEFAULT current_timestamp
);

create publication powersync for table public.list
The important point to note is the creation of a publication for PowerSync. This publication allows PowerSync to replicate changes made to your database, first to PowerSync and then to your application. Every table you want to use in your application must be listed; multiple tables are separated by commas.
Your application will need a URL ([.inline-code-snippet]VITE_SUPABASE_URL[.inline-code-snippet] in the [.inline-code-snippet].env.local[.inline-code-snippet] file you will create later) for PowerSync to use to access the Supabase API and a token used for anonymous authentication ([.inline-code-snippet]VITE_SUPABASE_ANON_KEY[.inline-code-snippet]). In a real application you would sign up users and a token would be returned when they log in.
You will also need a URI to use when setting up PowerSync’s connection to Supabase. You will find them on the [.inline-code-snippet]Project Settings[.inline-code-snippet] view of the Home Page. Clicking the [.inline-code-snippet]Project Settings[.inline-code-snippet] button displays a list of [.inline-code-snippet]Configuration[.inline-code-snippet] items.
Click on [.inline-code-snippet]Database[.inline-code-snippet], at the top of the view you will see [.inline-code-snippet]Connection string[.inline-code-snippet]. Click the [.inline-code-snippet]Display connection pooler[.inline-code-snippet] checkbox so it is unchecked. Copy and save the [.inline-code-snippet]URI[.inline-code-snippet] for later.
In the [.inline-code-snippet]API[.inline-code-snippet] settings find the [.inline-code-snippet]Project URL[.inline-code-snippet] and [.inline-code-snippet]anon public[.inline-code-snippet] key, copy both and save for later.
In [.inline-code-snippet]Authentication[.inline-code-snippet] settings, enable [.inline-code-snippet]Allow anonymous sign-ins[.inline-code-snippet] in [.inline-code-snippet]User Signups[.inline-code-snippet]. Be sure to scroll down and click the [.inline-code-snippet]Save[.inline-code-snippet] button, that can easily be overlooked.
PowerSync Project
Log in to your PowerSync account (or navigate to the Admin Portal) and create a new [.inline-code-snippet]PowerSync Project[.inline-code-snippet] named [.inline-code-snippet]powersync-basics[.inline-code-snippet]. Accept the defaults; the project’s dashboard will be displayed.
Create and Configure a New Instance
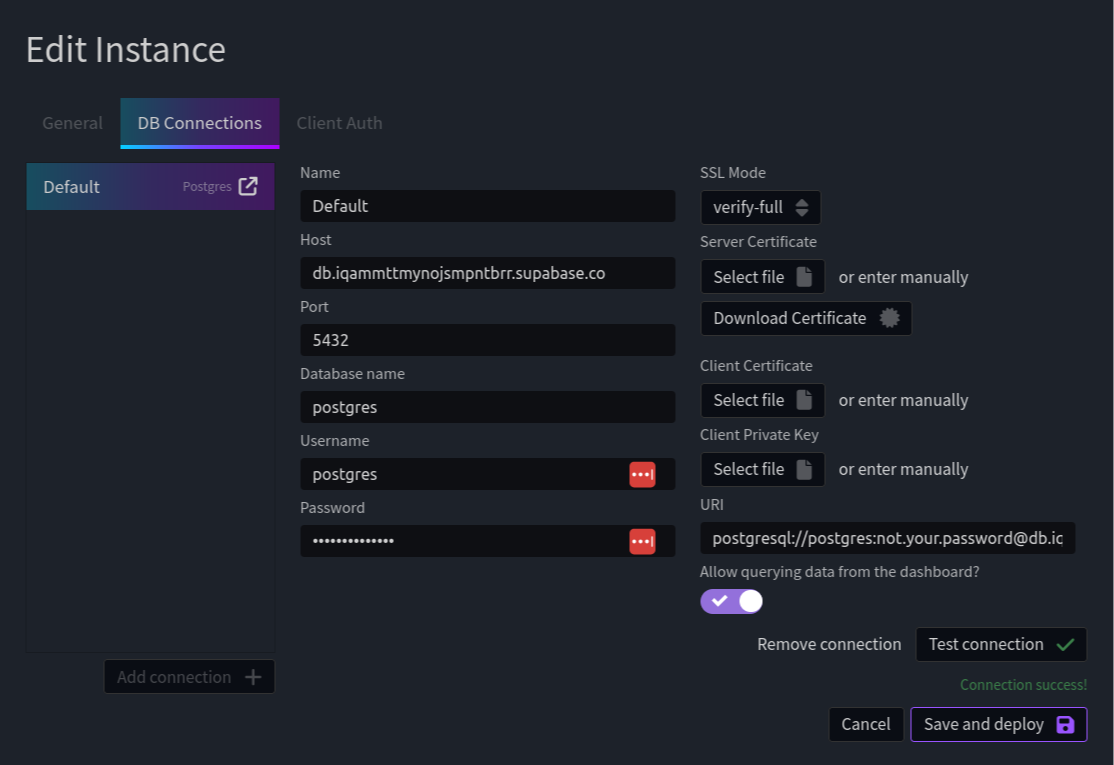
Click [.inline-code-snippet]Create New Instance[.inline-code-snippet] and name it [.inline-code-snippet]supabase[.inline-code-snippet], an [.inline-code-snippet]Edit Instance[.inline-code-snippet] dialog will be displayed. Click [.inline-code-snippet]DB Connections[.inline-code-snippet] and then click [.inline-code-snippet]Add connection[.inline-code-snippet]. Paste the connection URI into the URI input. Paste your database password into the [.inline-code-snippet]Password[.inline-code-snippet] input. Enable [.inline-code-snippet]Allow querying data from the dashboard[.inline-code-snippet], it’s useful for debugging.
Click [.inline-code-snippet]Test connection[.inline-code-snippet]. If the test fails, check all the parameters carefully.

Click the [.inline-code-snippet]Client Auth[.inline-code-snippet] tab and enable [.inline-code-snippet]Use Supabase Auth[.inline-code-snippet]:

Click [.inline-code-snippet]Save and deploy[.inline-code-snippet]. While you wait, copy the URL of the instance by clicking the copy icon on the [.inline-code-snippet]supabase[.inline-code-snippet] instance which you will find under [.inline-code-snippet]Instances[.inline-code-snippet] on the left side of the page. After deployment has finished you will create Sync Rules.
Create Sync Rules
PowerSync uses Sync Rules to determine what data from Supabase is synchronized to which of your application’s clients. In this application you will be using the simplest Sync Rules possible.
On the left side of your Powersync project, click on [.inline-code-snippet]sync-rules.yaml[.inline-code-snippet], replace the contents:
# Sync Rules docs: https://docs.powersync.com/usage/sync-rules
bucket_definitions:
 global:
   data:
     - SELECT * FROM list
All rows from the list table will be synced to all users. Click on [.inline-code-snippet]Validate[.inline-code-snippet] so PowerSync can verify that Supabase can satisfy the Sync Rules’ requirements. Assuming all is well, click [.inline-code-snippet]Deploy sync rules[.inline-code-snippet].
Add Supabase
You are now ready to connect PowerSync and Supabase.
Install Supabase
[.inline-code-snippet]npm install @supabase/supabase-js[.inline-code-snippet]
Add file [.inline-code-snippet].env.local[.inline-code-snippet] to the project root and insert the credentials you saved earlier:
VITE_SUPABASE_URL=[insert your Supabase project URL]
VITE_SUPABASE_ANON_KEY=[insert your Supabase anon key]
VITE_POWERSYNC_URL=[insert your PowerSync instance URL]
Add the Supabase Connector
Add file [.inline-code-snippet]src/supabase/index.js[.inline-code-snippet]:
import { BaseObserver } from "@powersync/web";
import { createClient } from "@supabase/supabase-js";

const FATAL_RESPONSE_CODES = [
  // Postgres errors
  /^22\d{3}$/, // Data exception
  /^23\d{3}$/, // Integrity constraint violation
  /^42\d{3}$/, // Syntax error or access rule violation
  // Supabase errors
  /^PGRST\d{3}$/, // PostgREST errors
];

export class SupabaseConnector extends BaseObserver {
 constructor(config) {
   super();
   this.config = config;
   this.client = createClient(
     this.config.supabaseUrl,
     this.config.supabaseAnonKey,
     {
       auth: {
         persistSession: true,
       },
     }
   );
   this.currentSession = null;
   this.ready = false;
 }

 async fetchCredentials() {
   const {
     data: { session },
     error,
   } = await this.client.auth.getSession();

   if (!session || error) {
     throw new Error(`Could not fetch Supabase credentials: ${error}`);
   }

   console.log("session expires at", session.expires_at);

   const credentials = {
     endpoint: this.config.powersyncUrl,
     token: session.access_token ?? "",
     expiresAt: session.expires_at
       ? new Date(session.expires_at * 1000)
       : undefined,
   };
   console.log("credentials", credentials);
   return credentials;
 }

 async uploadData(database) {
   const transaction = await database.getNextCrudTransaction();

   if (!transaction) {
     return;
   }

   let lastOp = null;
   try {
     // Note: If transactional consistency is important, use database functions
     // or edge functions to process the entire transaction in a single call.
     for (const op of transaction.crud) {
       lastOp = op;
       const table = this.client.from(op.table);
       let result;
       switch (op.op) {
         case "PUT":
           const record = { ...op.opData, id: op.id };
           result = await table.upsert(record);
           break;
         case "PATCH":
           result = await table.update(op.opData).eq("id", op.id);
           break;
         case "DELETE":
           result = await table.delete().eq("id", op.id);
           break;
       }

       if (result.error) {
         console.error(result.error);
         throw new Error(
           `Could not update Supabase. Received error: ${result.error.message}`
         );
       }
     }

     await transaction.complete();
   } catch (ex) {
     console.debug(ex);
     if (
       typeof ex.code == "string" &&
       FATAL_RESPONSE_CODES.some((regex) => regex.test(ex.code))
     ) {
       /**
        * Instead of blocking the queue with these errors,
        * discard the (rest of the) transaction.
        *
        * Note that these errors typically indicate a bug in the application.
        * If protecting against data loss is important, save the failing records
        * elsewhere instead of discarding, and/or notify the user.
        */
       console.log(`Data upload error - discarding ${lastOp}`, ex);
       await transaction.complete();
     } else {
       // Error may be retryable - e.g. network error or temporary server error.
       // Throwing an error here causes this call to be retried after a delay.
       throw ex;
     }
   }
 }

 async loginAnon() {
   const {
     data: { session },
     error,
   } = await this.client.auth.signInAnonymously();

   if (error) {
     throw error;
   }

   this.updateSession(session);
 }

 updateSession(session) {
   this.currentSession = session;
   if (!session) {
     return;
   }
   this.iterateListeners((cb) => cb.sessionStarted?.(session));
 }
}
There’s a lot going on in that minimal implementation of [.inline-code-snippet]SupabaseConnector[.inline-code-snippet]. If you run into trouble when you first try to run the project, check the console output.
The [.inline-code-snippet]fetchCredentials[.inline-code-snippet] function attempts to connect to your Supabase instance. Look for the credentials to show up in the console. If they do not, or if an error is thrown, make sure you have the correct values for [.inline-code-snippet]supabaseUrl[.inline-code-snippet] and [.inline-code-snippet]supabaseAnonKey[.inline-code-snippet].
The [.inline-code-snippet]uploadData[.inline-code-snippet] function is used by PowerSync to send changes to Supabase.
Both of those functions could be used with some other database connector.
NB. If an exception is thrown in SupabaseConnector’s [.inline-code-snippet]uploadData[.inline-code-snippet] method an error will be logged in the console using [.inline-code-snippet]console.debug[.inline-code-snippet]. When debugging your application be sure to enable Verbose console output or you may not see important messages.
Modify src/database/index.js
Just below the line [.inline-code-snippet]let PowerSync[.inline-code-snippet]; add
[.inline-code-snippet]let Supabase;[.inline-code-snippet]
Add the following code after the [.inline-code-snippet]create[.inline-code-snippet] function:
xport const connect = async (config) => {
 console.log("connecting to supabase ...");

 await PowerSync.connect(Supabase = new config.connector(config));

 console.log("connected to supabase");
 console.log("connected to powersync");
};
Add await [.inline-code-snippet]connect(config)[.inline-code-snippet] to [.inline-code-snippet]openDatabase[.inline-code-snippet]:
export const openDatabase = async (config) => {
 create(config);
 await connect(config);
};
Add the function [.inline-code-snippet]loginAnon[.inline-code-snippet] after [.inline-code-snippet]connect[.inline-code-snippet]:
export const loginAnon = async () => {
 await Supabase.loginAnon();
};
Modify src/index.js
At the top of [.inline-code-snippet]src/index.js[.inline-code-snippet], add [.inline-code-snippet]loginAnon[.inline-code-snippet] to the database imports. Import the [.inline-code-snippet]SupabaseConnector[.inline-code-snippet].
import {
 loginAnon,
 openDatabase,
 insertItem,
 updateItem,
 allItems,
 deleteAllItems,
 watchList,
} from "@/database";
import { SupabaseConnector } from "@/supabase";
Modify [.inline-code-snippet]config[.inline-code-snippet]:
const config = {
 supabaseUrl: import.meta.env.VITE_SUPABASE_URL,
 powersyncUrl: import.meta.env.VITE_POWERSYNC_URL,
 supabaseAnonKey: import.meta.env.VITE_SUPABASE_ANON_KEY,
 connector: SupabaseConnector,
 filename: "add-supabase.sqlite",
};
In the [.inline-code-snippet]document.addEventListener[.inline-code-snippet] callback, add await [.inline-code-snippet]loginAnon()[.inline-code-snippet] after await [.inline-code-snippet]openDatabase(config)[.inline-code-snippet];
Run the project

Finally, open your browser, enable developer tools, and run the project. Examine the console log. It might take a few seconds for PowerSync and Supabase to connect the first time you run the project.
If there are no errors, enter and edit items, reload the browser to ensure they have been persisted.
If there are errors and they do not directly indicate the source, then you should check [.inline-code-snippet].env.local config[.inline-code-snippet], login to your Supabase project and ensure it has the data, login to your PowerSync project and use SQL to retrieve the list items from Supabase. If you still haven’t discovered the source, you should check all of the PowerSync and Supabase settings.


